Unit 32 experimental imagery in photography
Tuesday, 17 December 2013
solarisation
Normal print exposed for 15 seconds, then placed in the developer, stop, fix and then rinse.

solarised print exposed for 15 seconds, then placed in the developer for 15 seconds and while still in the developer you walk out the darkroom and just quickly expose it to the light. Then you go back in the dark room and place in the stop, fix and then rinse.
solarised print exposed for 15 seconds, then placed in the developer for 20 seconds and while still in the developer you walk out the darkroom and just quickly expose it to the light. Then you go back in the dark room and place in the stop, fix and then rinse.
solarised print exposed for 15 seconds, then placed in the developer for 30 seconds and while still in the developer you walk out the darkroom and just quickly expose it to the light. Then you go back in the dark room and place in the stop, fix and then rinse.

test strip for normal print, exposing for 5 seconds while the rest of it is covered, then move over so more paper is exposed and another 5 seconds and just keep doing this until the whole strip is done. Then place in the developer, stop, fix and then rinse. You should be able to see where its underexposed, exposed at the correct time and then overexposed.

solarised print exposed for 15 seconds, then placed in the developer for 15 seconds and while still in the developer you walk out the darkroom and just quickly expose it to the light. Then you go back in the dark room and place in the stop, fix and then rinse.
solarised print exposed for 15 seconds, then placed in the developer for 20 seconds and while still in the developer you walk out the darkroom and just quickly expose it to the light. Then you go back in the dark room and place in the stop, fix and then rinse.

test strip for normal print, exposing for 5 seconds while the rest of it is covered, then move over so more paper is exposed and another 5 seconds and just keep doing this until the whole strip is done. Then place in the developer, stop, fix and then rinse. You should be able to see where its underexposed, exposed at the correct time and then overexposed.
sandwich negative
test strip


Once you have the timing right for your bottom image you add another negative into the neg holder. Next you expose your image then place in the developer, stop and fix.
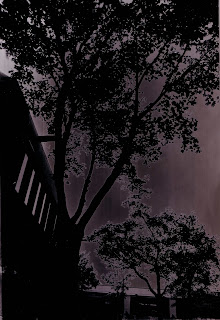
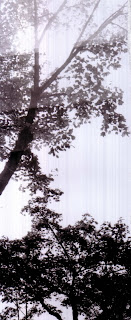
I used the same image and solorised it however I don't think it worked well because its too dark and I should have exposed for less time while it was in the developer.
Monday, 16 December 2013
Maggie Taylor
Maggie Taylor is an artist who works with digital images and manipulation. She creates these images by scanning objects into a computer suing a flatbed scanner then layering and manipulating the images using Photoshop. She creates very surreal montage images.
Monday, 18 November 2013
My final experimental image
http://betweennapsontheporch.net/four-beautiful-christmas-table-settings-in-one-gorgeous-victorian-home/ - back ground (house and trees)
http://thisandthat.edublogs.org/2012/12/25/christmas-christmas-time-is-here/ - Christmas tree
The three images of the people and the snow on the floor are my own images. The images of Lana and Mollie are old images that I shot in the studio and out on location. The image of Ollie is a new image that I took in a park. He was in the park playing with his sister. Red/green gradient tool because that adds a Christmas feel for me personally.
First I opened the background image of the house in photoshop.
I then opened the image of Mollie and roughly cut her her and pasted her onto the image of the house by dragging the image on top. I added a layer mask to the image of Mollie so that I could remove any things that weren't needed and more background could be seen.
I did the same with the image of Lana, however I played around with scale and size. I made Lana smaller so it looks like she's looking out from the house.
Again I did the same with the image of Ollie and just made him slightly smaller so it looks like he's further back than Mollie.
In the original image where I placed the christmas tree there was a fountain feature so I just used the bottom of that as a guide for where to place the tree.
Next I used an old picture of snow that I'd taken and placed just above the background layer so that the other images that I'd just added would still be seen. I used a layer mask to remove the top part of the snow image so it only covered the ground.
Lastly I used the gradient tool with red and green to add the colour on top on the image.
Looking at the image now, I think it would have worked better without the christmas tree as it just looks a bit out of place and you can see where I've used photoshop to cut the image out. I do like the image though I think it has a weird horror film type of feel to it. I reminds me of something I'd see on the tv show The Vampire Diaries.
Monday, 28 October 2013
My final images deadline
For this unit the final out come is images based around the theme December with the deadline being the 18th November. That only leaves me with 4 weeks left to hand in my images so to help with keep to this deadline I have crated a week by week timetable of deadline for myself.
Week 1 - 28th October - 3rd November
Week 2 - 4th November - 10th November
Week 4 - 18th November - 24th November
Week 1 - 28th October - 3rd November
- Finish research.
- Shoot images.
Week 2 - 4th November - 10th November
- Edit images.
- Capture more images if needed.
- Get feedback on images so far.
- Continue to edit images
- Refine where possible.
Week 4 - 18th November - 24th November
- DEADLINE - HAND IN IMAGES.
Subscribe to:
Comments (Atom)


