When you have finished painting over the area, click on the quick mask tool again and you will see marching ants going around your selection and the edge of your image. This is because everything but your masked area is selected. Go to Select > Inverse to select your masked area. Press cmd-J to make a new layer from your selection.
You can now use Edit > Transform > Scale to increase the size of your subject’s head. Make sure that you have the link between the W and H selected so that you increase the size proportionally.
To place the larger head layer correctly, reduce the Opacity of the layer and use the Move Tool to line up the layer with the original one.
Return the Opacity slider to 100%. You need to get rid of any overlap on your image from the larger head layer. Add a layer mask by clicking on the layer mask icon at the bottom of your Layers Panel (the rectangle with a circle in it to the right of the fx icon). Use a black brush to paint over the areas that you don’t want to show up. You will need to zoom in when working and probably turn your layer off and on to check your progress. As with the quick mask tool, you can paint areas back in using a white brush. Then merge the layer down to the one below using Layer then Merge Down.
For the next step, add a Hue/Saturation Adjustment Layer – make sure you do this from the adjustments panel rather than going to Image Adjustments and affecting layer 1. Looking at the face, reduce the saturation by moving the slider to the left. To only have the effect on the skin, you need to block out the effect form the rest of the image using the layer mask. As you only want a small amount to show, with the layer mask selected, press cmd-I. This will fill your layer mask with black and block the de-saturation effect from the entire image. Select the white brush and paint over the skin and hair to show the de-saturation where you want it. Merge down again.
The eyes can be distorted with the Warp Tool. Use a Lasso to select an area around the subject’s eyes. Press cmd-J to create a new layer. Go to Edit > Transform > Warp and a grid will come up. You can click on the handles or on the lines and pull them around to change the shape of the eyes.
Following the style of Lux’s image, soften the skin slightly. You can do this by adding a Gaussian Blur or by using an inverted High Pass Filter. For the latter, flatten your image (Layer > Flatten Image) and produce a copy layer (cmd-J). Choose Filter > Other > High Pass. Set the Radius so the image outlines are just showing through the grey and click ok. Change the layer Blend Mode to Soft Light (or overlay if you want a stronger look).
At this point you will notice that the image has been sharpened rather than softened. Press cmd-I to invert the effect and soften the skin. Since you only want this effect on the skin, add a layer mask and fill it with black (cmd-I). Then use a white brush to paint the softening effect back in on the skin. Avoid the eyes and lips to keep a more realistic effect.

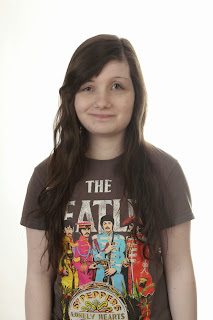
Original image

Edited image
No comments:
Post a Comment